Modelers love Star Wars. For the most part, we have all built one or more of the iconic ships from the famed series.
In this episode I will be reviewing the Bandai 1/48 scale X-wing Starfighter – Moving Edition. At just under $100 US the kit is affordable and packed with excellent features. The box is hefty and feels like a real value for the price. Opening it up, we find 7 sprues of parts, cast in various colors, and a large black box containing the electronic display stand and moving wing parts. The main box also contains a 21-page black and white instruction manual with a full-color glossy cover, and two sheets of markings and colored panels. One is water slide decals and the other is poly stickers.
The first steps of the build include installing 3 AA batteries in the electronic stand, and test fitting the moving assembly. This assembly is a white colored gearbox with wing roots and 6 LED’s pre-wired to it. Four of them are the red LED’s for the engines. The cockpit and proton torpedo launchers have one each, a yellow and a red LED respectively. After testing the function of the wings, the LED’s and the built-in sounds, the building of the ship begins.
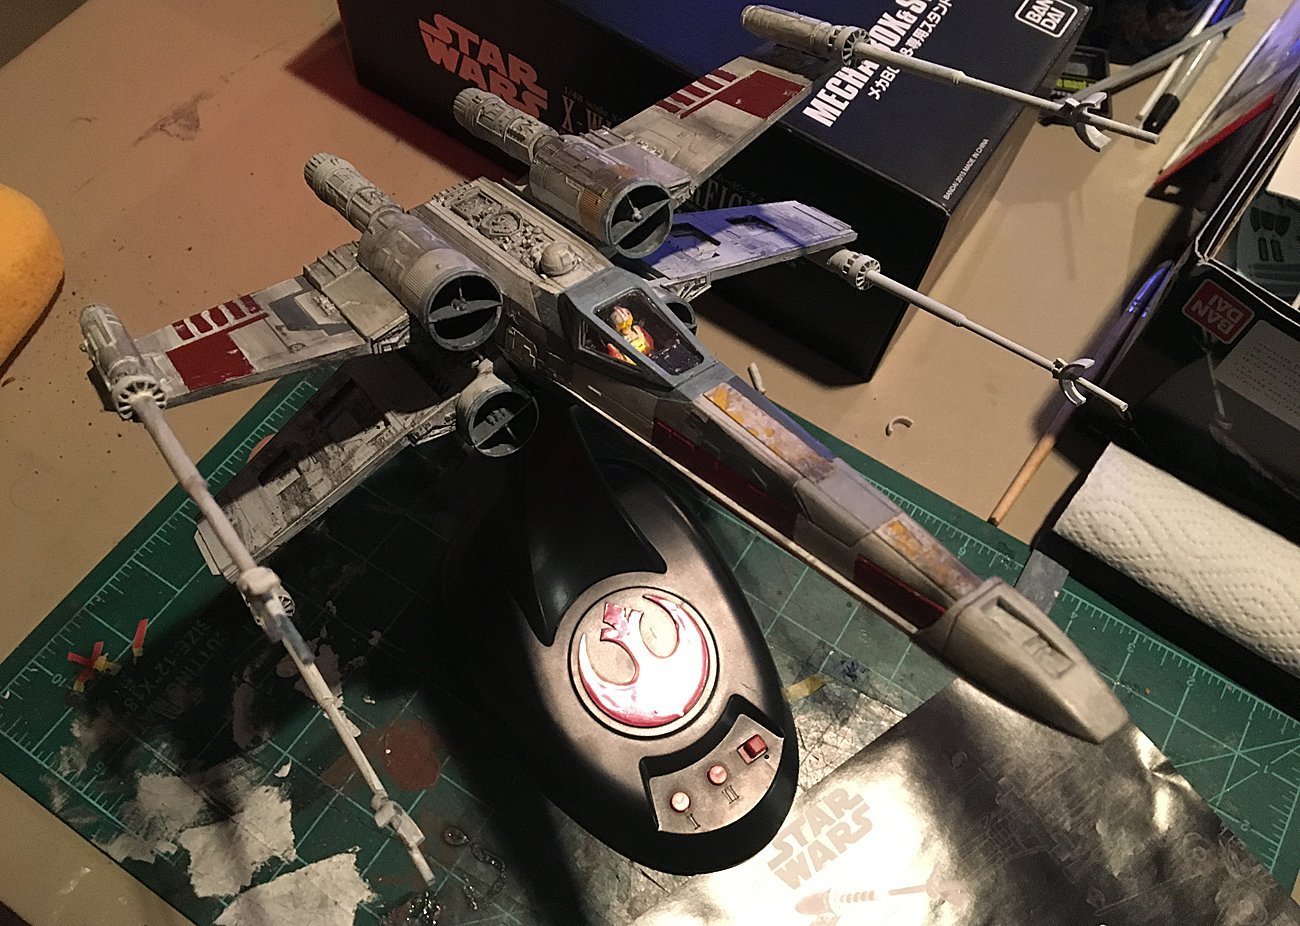
The fuselage is assembled centered around the wing gearbox. The lower fuselage half is the base for building. The Proton torpedo launchers are lit with a single LED which shines through a piece of clear plastic that acts as a block optic. The cockpit is assembled and placed in the hull.
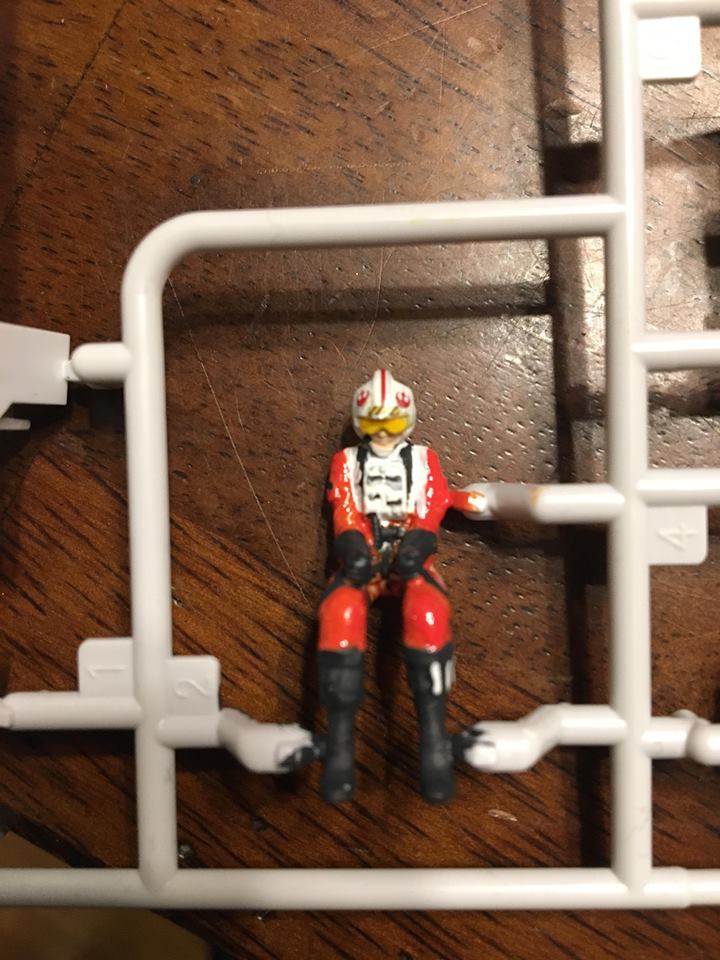
At this point, I stopped briefly to paint the well designed, and authentic looking pilot figure. The helmet details and fine red pinstripes are provided on both the water slide decal and sticker sheets.
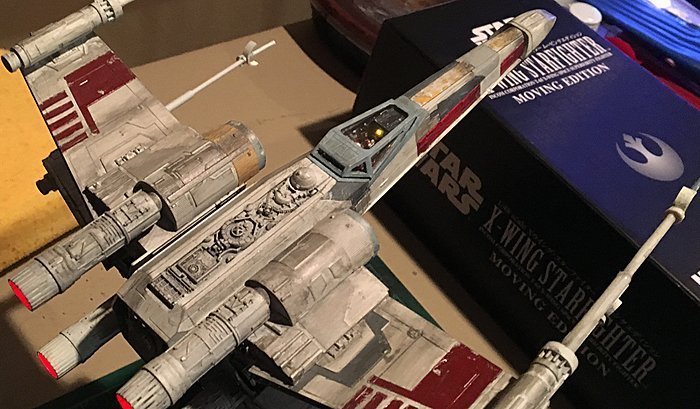
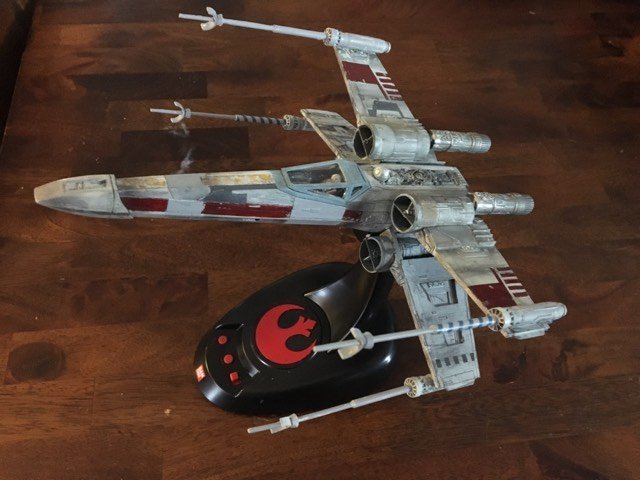
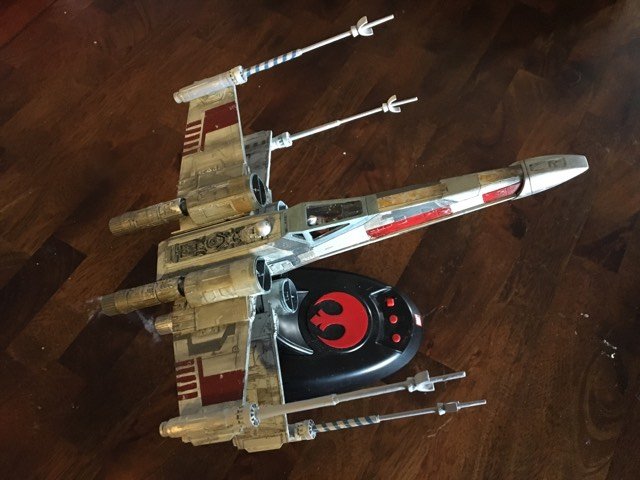
Once the cockpit and pilot are assembled, the fuselage sides are installed. They are comprised of several colored block style pieces that provide the bulk and structure of the forward fuselage. The upper fuselage is installed in two main pieces, the forward nose piece, and the aft portion containing the droid and trench. All of the fuselage sections mate tightly along panel lines, which adds to the realism of the ship. The rear of the ship is installed and the finished fuselage is installed on the display stand for the assembly of the wings. All four wing sections come with inset color panels which serve as the markings of the wings and establish the later placement of the decals or stickers. The wings are assembled from upper and lower pieces. The 4 wingtip laser cannons are simply assembled but look very authentic. The model is built of sturdy but forgiving plastic which makes the spindly laser cannons strong enough to last. Once the wings are each placed on the moving gearbox, the wire for each of the engines is fed through and placed securely within the aft engine sections. These also have optic pieces disguising the appearance of the raw LED’s.
The kit is well engineered and needs no adhesive to hold it together under normal conditions.
Speaking of normal conditions, it is at this point I will pause to tell you that I love my daughter. I love her and thus I allowed her to have a cat. I also love my son and gave him a puppy.
After I had gone to bed at this stage of the build, my beloved daughter’s cat playfully batted the laser cannons off of my build table on to the floor. My dear son’s precocious puppy lovingly destroyed them.
I discovered this the next evening. I was none too pleased. I was able to salvage and repair all but one of the lasers. Carefully I reassembled their gnawed pieces. The third would have to be built with donor parts from the 1/43 MPC X-wing, which I cut down and sculpted into shape.
It’s a good thing for these hairy beasts that I love my children.
Let’s move on with the build.
The landing gear is designed to be removable so that the ship can be displayed in a landed posture. They are well designed and strong enough to be durable. Decal placement is laid out in color on the back cover of the instruction manual. Applying them really makes the ship come together.
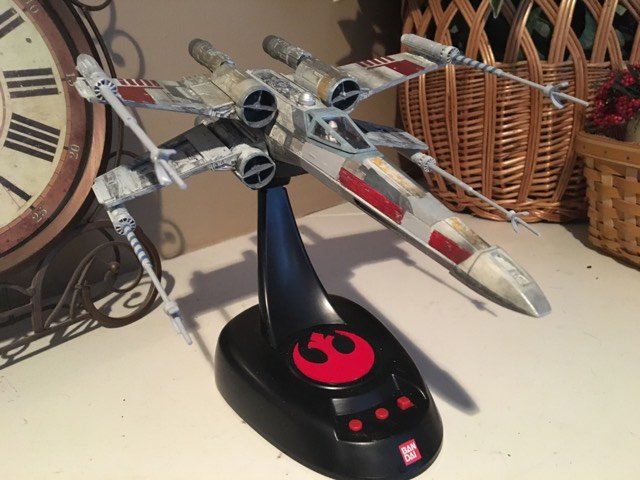
I found the cast colors to be a bit too stark. The decals are a bit too bold and sterile for me having no weathering or gradients. I opted to paint the colored panels and use a wash and pigments to dirty up the ship. The cockpit is provided in two pieces, one is the frame and the other the glass. Masked on the inside, the cockpit frame can be installed on the ship to allow for painting without threatening the window or the cockpit interior.
This kit, well built, is an impressive piece to display. It is large enough to appreciate the fine detail the Bandai cast into the kit. The moving functions offer a bit of fun as well as allowing for static display in both flight modes. The landing gear must be removed to open the wings, so be careful with that. I recommend this kit for the intermediate modeler. Young builders may have trouble installing the fiddly bits in fuselage or engines. The wiring must be done carefully as to not pinch the wires. More experienced modelers will find this kit fun to build and nice to display whether you use the cast colors and decals, or do as I did and paint it.


My final piece of advice concerning this kit is to place all small parts well out of the reach of kitties and puppies. Seems they are a fan of these great Bandai kits too.
You can find me at Everything Millenium Falcon Group on Facebook.