

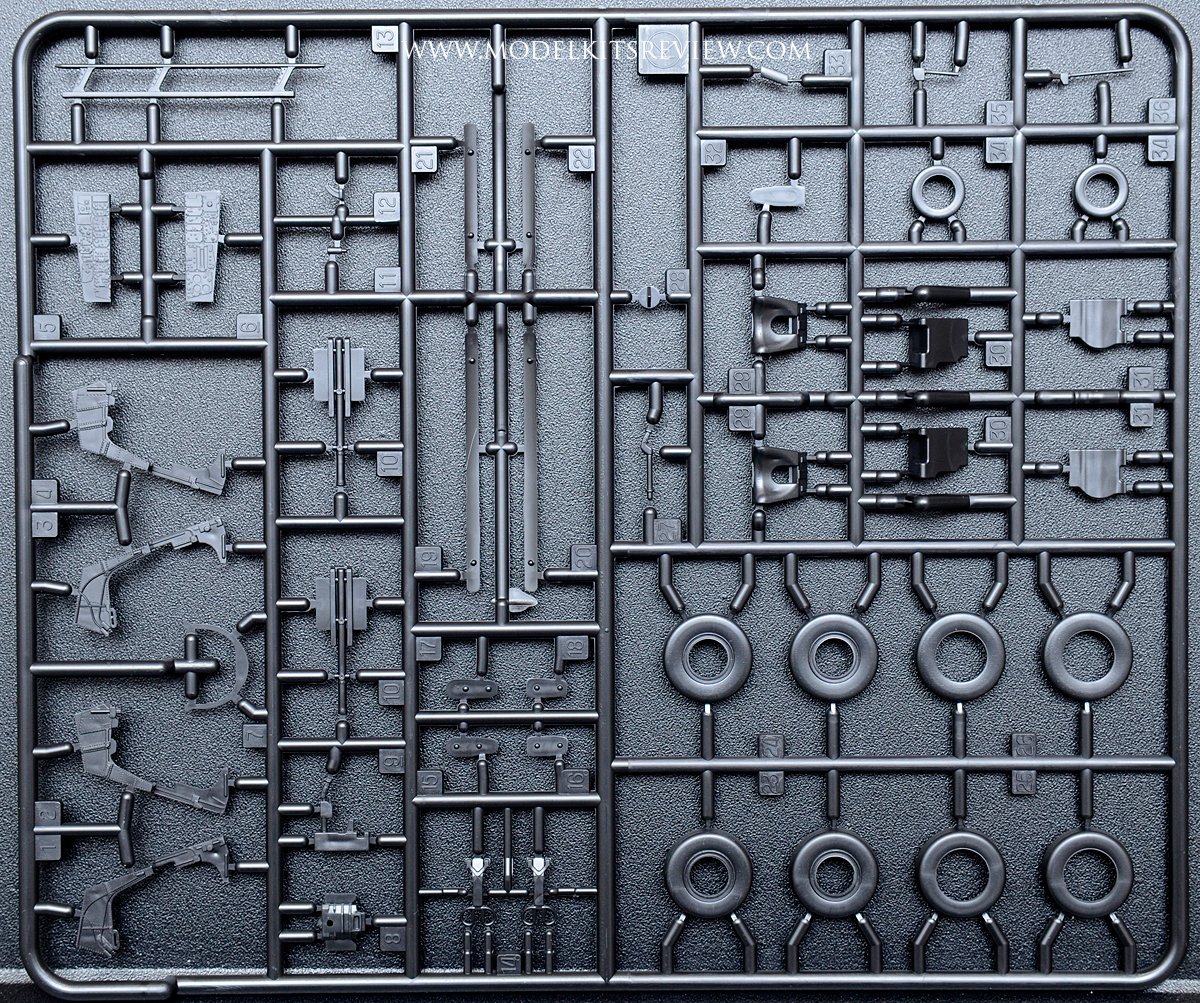
Well, and here it is. For the last 7 to 8 weeks in a row, 1 of our most visited pages (followed by the Trumpeter 1/200 Bismarck) has been the Academy 1/48 Phantom F-4B. I’m pleased to announce the pictures of the sprues. They are in a large size format so you can enjoy them better. This page will not only showcase the pictures of the sprues for the Academy F-4B, but it will also feature its work in progress which will start this week.
If you are subscribed to our newsletter, you will only receive one notice. This same page will be updated but you will not receive notifications via emails with each work-in-progress update. My suggestion, bookmark this page and come back often. I will do my best to have a daily update by 7 PM CMT.
I want to express my sincere thanks to Paul over at Hub Hobby in Richfield, MN for hooking me up with this kit.
![]()
Friday, February 8, 2013
You can see the finished Academy F-4B model here.
![]()
Tuesday, January 29, 2013
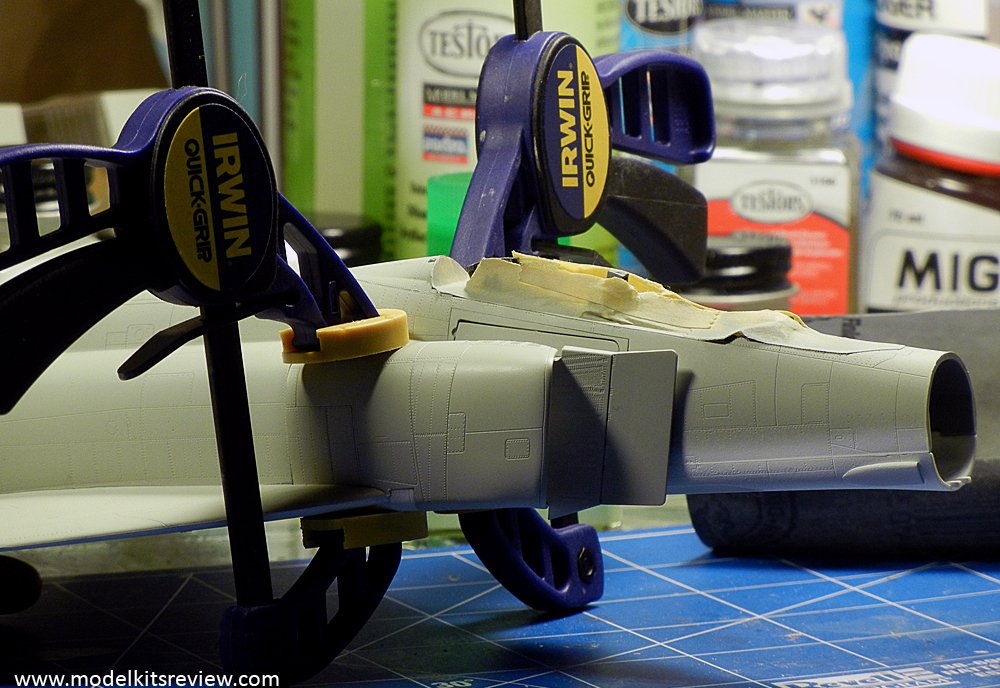
Another week, another update. Here are some pictures of some of the sub-assemblies made to the Academy F-4B during the last few days. At the time I’m posting this, the model is currently in the final stages of decals and stencils. All sub-assemblies have been coming together very nicely until I found a gap in the wing-to-fuselage front section (see pictures below). No big deal, it was quickly fixed with A+B Epoxy, and 30 minutes later I was touching up the area with paint.
As you can see in the pictures, there are clamps used to hold the intake covers. I found no major fit issues in this area but at least on my copy clamps were needed to hold the pieces in place until the cement had dried. The clamps will help give the covers a little bit of concave shape while the cement sets.
Stick around for the last installment of this build hopefully by the end of this week.


![]()
Tuesday, January 22, 2013
It was said and it was done!
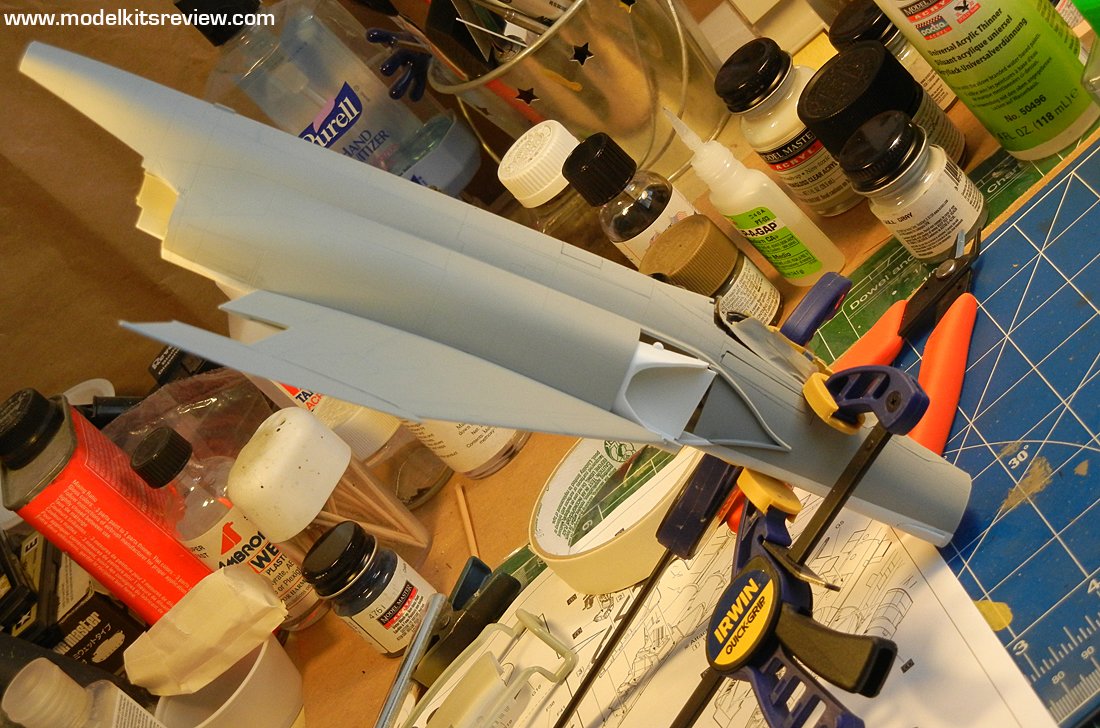
The upper fuselage fits the lower fuselage with absolutely no problems whatsoever. Based on the initial dry fit test, I concluded that as the Tamiya 1/32 Phantom II, both fuselage halves would be painted in their respective colors separately and then assembled together.
This saves a lot of time and masking tape and you can see the fit quality on the picture below. There will be some minor masking, but only to create a soft demarcation between the white and Gull Gray. It will be done at low pressure with my AZTEK airbrush, so this won’t be a messy step.
Both halves were glued together from the inside using Tamiya Extra Thin Cement with a Touch-N-Flow needle. The Touch-N-Flow (needle only), was the best $6 I ever spent in this hobby 😉
This doesn’t seem like a big update on this build. But only in pictures. There are sub-assemblies around my studio that have been painted already. Once I put them all together, this kit will be on its feet soon.
Cheers!

![]()
Saturday, January 19, 2013
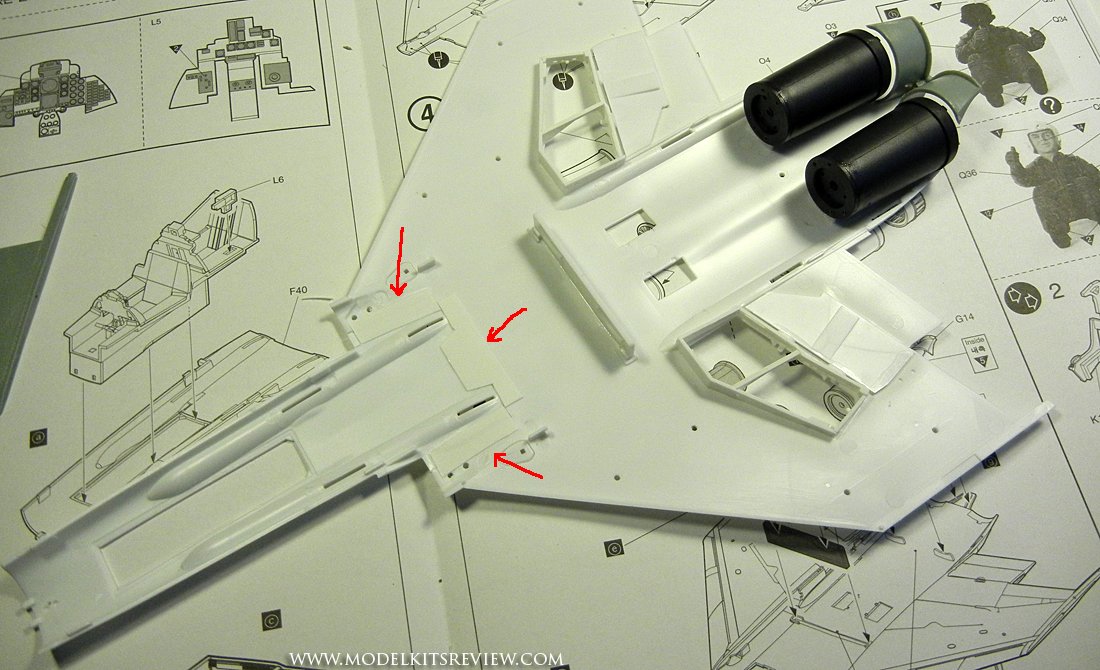
Another day, another update on the 1/48th Academy F-4B Phantom. The pictures don’t show ”considerable” progress. I’ve been working on this model kit skipping some assembly steps and going back and forth through them. The well wells have been painted with Tamiya XF-2 Flat White from the inside so when they get painted from the outside nooks and crannies get evenly coated.
Since I have to use clear gloss to protect the base paint from the enamel wash, there is no point in painting the wells gloss white. No point from the premise that flat colors stick stronger to the surface and dry faster. The lower fuselage sub-assembly is comprised of 2 parts, B-1 and F-40. There are no support tabs from the inside on either part. Considering the size of these parts, there is little glue surface which can be a potential headache during final assembly. As you can see on the red arrows, I used .010 styrene stock from Evergreen to reinforce that area.
So far, this model kit has been a pleasure to work with. Dry fit tests show outstanding fit to the point that I’m considering painting the lower fuselage separated from the top one. That’s the way I did it with the Tamiya F-4J 1/32. I have not found any issues with parts misalignment or poor/fair fit.
Sponsored or not, I’m not here to sugarcoat any build. This kit so far has been a dream build. I found the hard way that I shouldn’t have committed the ejection seats with glue to the cockpit tub. There is some advice about it in the instructions. My mistake.
Stay tuned folks!


![]()
Thursday, January 17, 2013
Here is my first update on the Academy 1/48 F-4B. The cockpit tub is very simple on the kit but it comes to life via detail panels. For the tub, I used Model Master Acryl Green Zinc Chromate as a base color. It was followed by a coat of AK Interactive Worn Effects fluid (AK-088), which shortly after received the final coat of Acryl Dark Gull Gray. Then some scrapping with a toothbrush was done on the high-traffic areas revealing some wear and tear.
On the real Phantom cockpit, there aren’t a lot of colors around the control panels. But to break that monotone, I painted knobs and switches with a toothpick using flat enamel red, yellow, and white using the classic Testors square bottles.
The ejection seats are very nice in my personal opinion. They have nice surface detail on the side panels of the seat, however, they look quite bland without seat belts and harnesses. For the price of this kit and overall quality, I believe that a small fret of photo-etched seat belts wouldn’t hurt. What you see on the ejection seats is not dry-brushing but rather a homemade white artist oil wash.
I usually use seated pilots, either displaying the model cockpit closed or both. Not this time! I had in my spare box some lead foil from Verlinden. I also had a brand new set of 1:43 seat belt buckles from Verlinden (0065). They might not be the same exact ones but hey, it is better than nothing 😉
Questions or comments are more than welcome below.


![]()
Monday, January 14, 2013
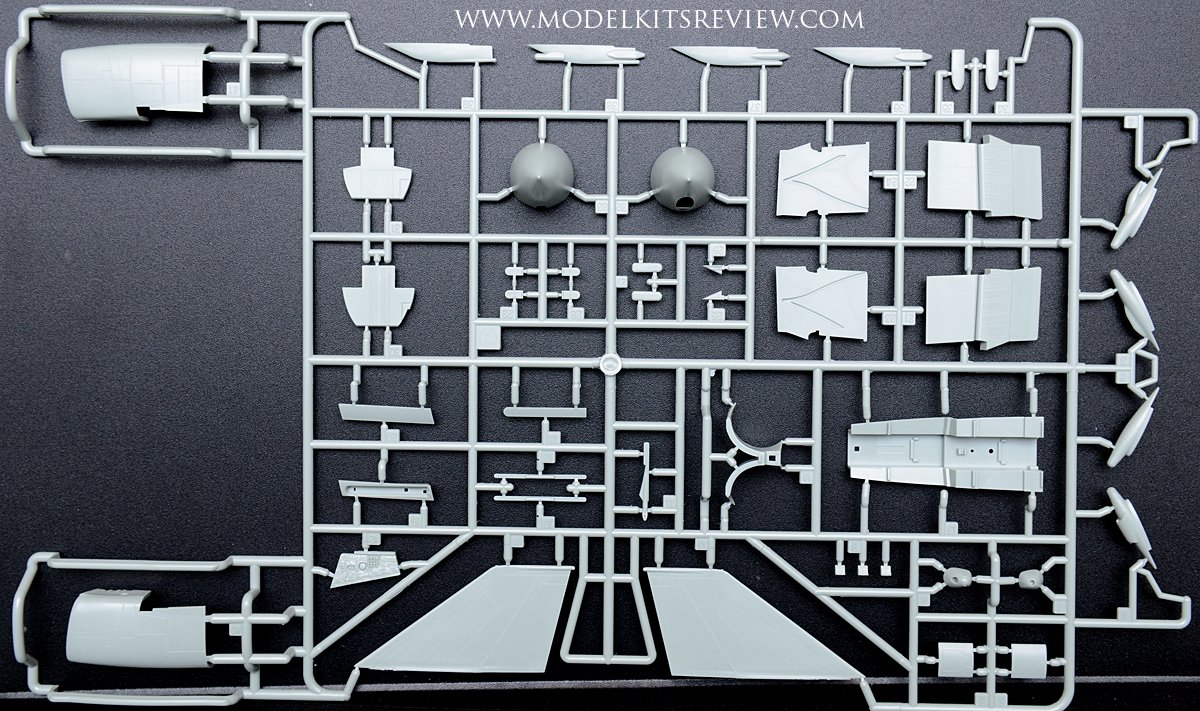
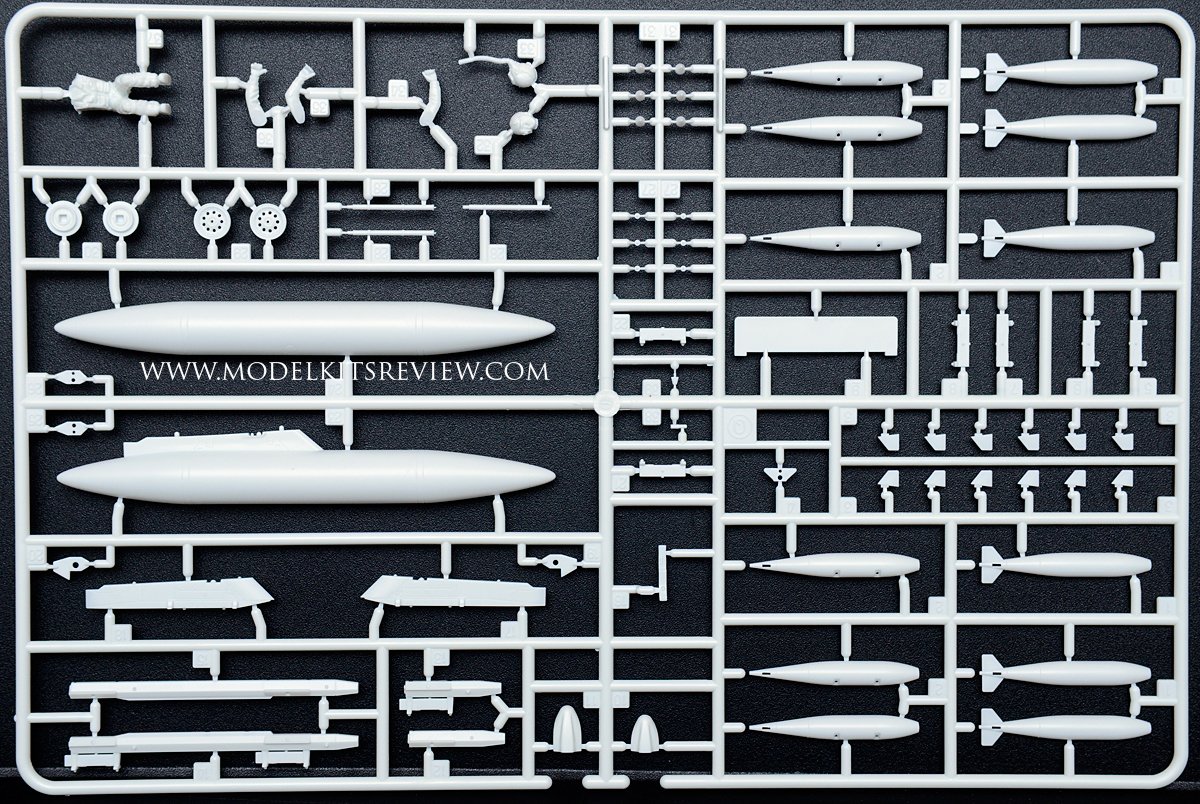
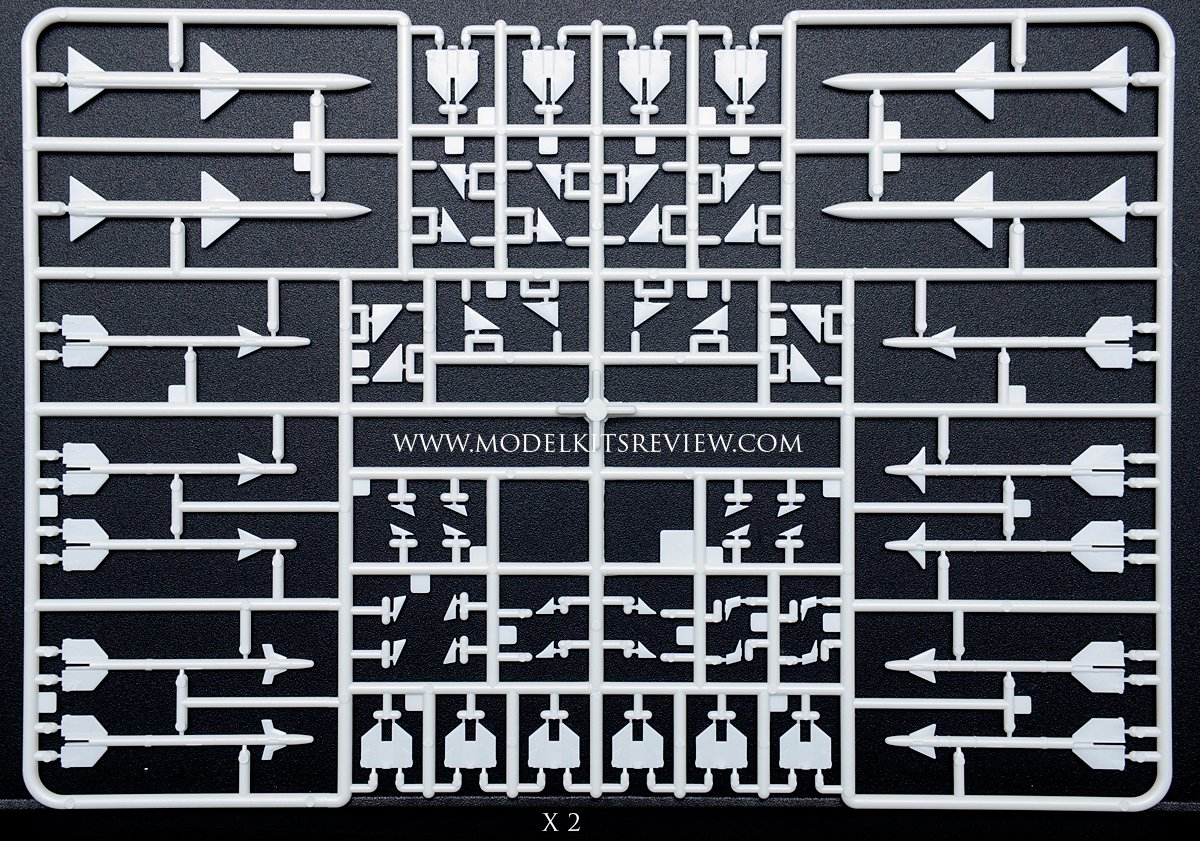
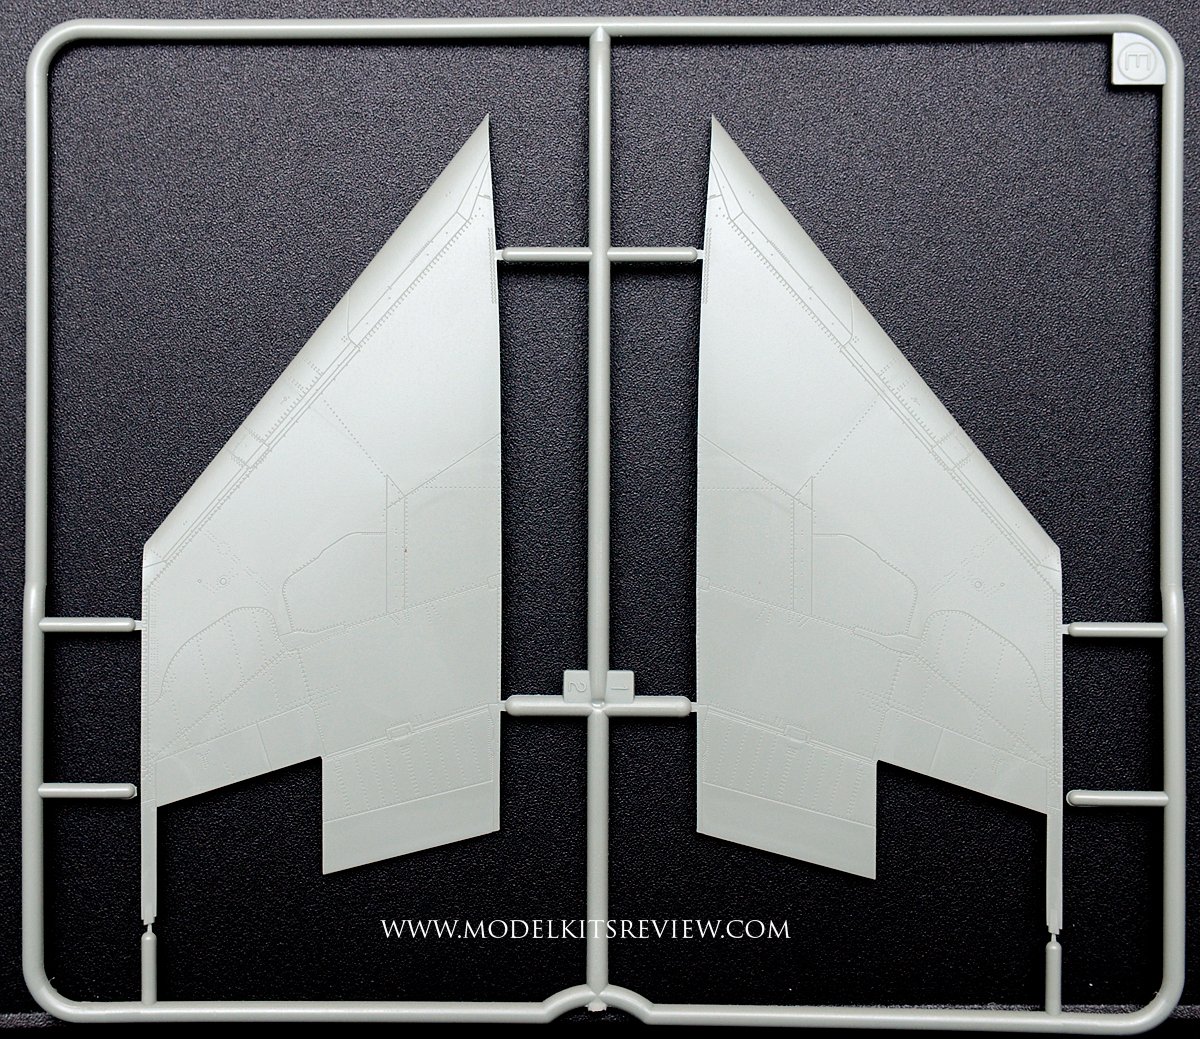
At the risk of sounding overly excited, the new Academy F-4B features beautiful surface detail, and extra nose cones, and Academy went the whole nine yards with the provided ordnance. If you have ever built a 1/32 Tamiya jet model, like the Phantom F-4J, you will feel at home detail-wise and injection molding quality.


nice cockpit ! but why they didn’t put any decals for it?
Good question cesare.
On anticipated models like this one, we rather show the model built completely out of the box. Thanks for looking and commenting.
Thanks for the write-up on this one, George. I traded for one of these with one of the Agape members and should receive it shortly. I will put it on my short list of future builds. I am pretty much going to do OOB, but will have to do something about the seatbelts.
Trust me Hutch, you’re going to love this kit. Check the parts that won’t be used from the instructions, select before hand the ordnance you’ll use and get the rest off your way. They make the kit look overwhelming 😉